To use a drawknife, securely clamp the wood piece with the desired area facing up. Grip the drawknife handles firmly, with the beveled side facing the wood. Position the blade at a slight angle and pull towards you, using controlled strokes. Adjust the angle and pressure to achieve desired wood removal and shaping.
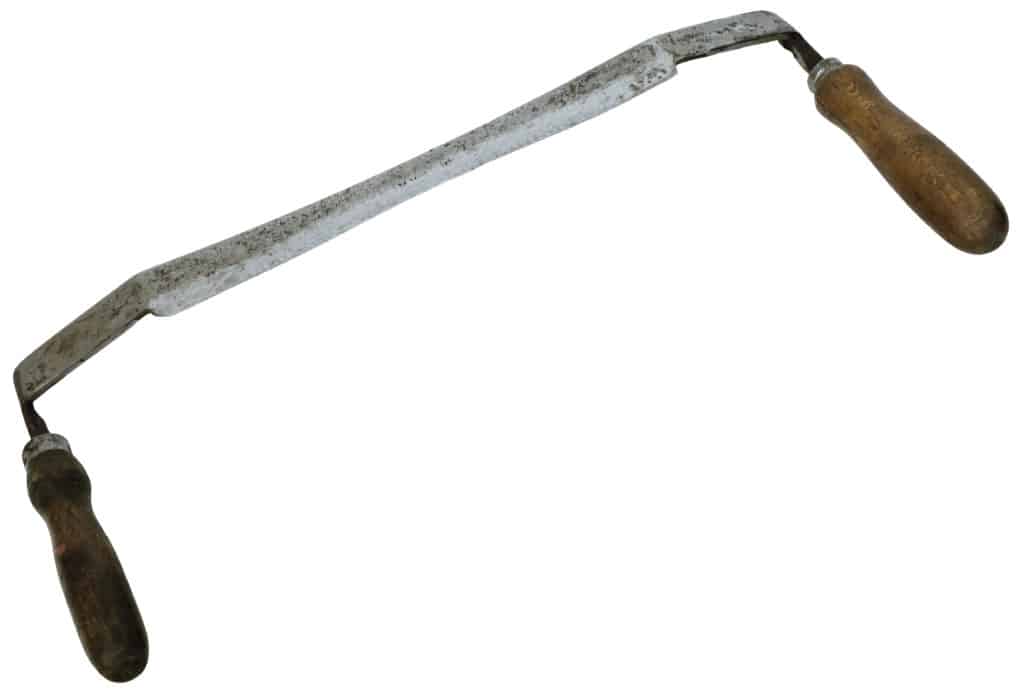
A drawknife is a traditional hand tool for woodworking which shapes wood by removing shavings. It is a slightly curved blade with handles on both ends and it’s pulled or drawn to the user, which is why it’s called a drawknife. With most blades or knives, you push the tool away from you, however, with a drawknife you pull the tool towards yourself.
This article is an in-depth guide regarding how to use a drawknife properly and safely. Keep reading to find out all about it!
Table of Contents
Uses of a Drawknife
Drawknives are used for creating billets for lathe, debarking trees, and getting a thin wooden shave. The cut of a drawknife is quite similar to a knife. Despite its size, the cutting area of the drawknife is small – if it was large, it would be very difficult to actually use it.
A basic drawknife usually has a blade of 6-10 inches with a bevel on one side. The handles are set at a bit down the plane and at a right angle to the blade.
The drawknife can be used to remove multiple layers of wood at a time and with proper practice, you can master the art and create fine cuts in no time. If you want to rapidly remove a larger chunk of wood then make a deep cut, however, make sure you do that carefully otherwise you’ll end up damaging both the wood and the blade.

Curved Drawknife vs Straight Drawknife
Curved drawknives are an excellent choice for getting specific spots where it’s hard to reach with a straight drawknife. Curved ones are also a great choice for making deeper cuts. On the other hand, straight drawknives are an excellent choice for making fine smooth cuts. Both kinds provide results, though, and the best kind of drawknife is “one that cuts”, as the popular saying about cutting tools goes among woodworkers. Time and practice is more important for learning to use a drawknife than whether it’s curved or straight.
The drawknife that I use at home is the Timber Tuff 8″. It was wooden handles, an allow steel blade and a 30 degree angle.
What size drawknife should I use?
For normal woodworking you should pick a drawknife with a cutting edge between 8 and 10 inches as this will be suitable for most tasks.
How to Use a Drawknife
To use a drawknife, you should grip it using both of your hands with the bevel facing up and then change your grip with the bevel facing down. Drawknives are generally used with the flat side down as this motion ensures a finer cut, but you can also opt for bevel down if you find that to be more convenient for you. Working with the bevel down results in a more aggressive slicing where the bevel acts as a slide and fulcrum. The bevel facing up gives you more of a shearing cut, while the bevel facing down gives you more of a scooping action. Some woodworkers and proponents of using drawknives bevel-down say that it gives you more control over the depth of the cut, as the blade won’t slice into the wood as easily. In any case, it’s your choice and you should try out both approaches to figure out which one works best for you and your project.
The best way to use a drawknife is undoubtedly in a seated position where you can have a proper grip and full control over the tool. This position will enable you to use the power in your legs to draw the tool towards yourself.
You don’t have to pull the drawknife towards yourself, however. Drawknives can also be used by pushing them away from yourself. This is useful especially when you’re standing up while using it and can’t used your legs and back as much.
As with most woodworking tools, do your best to cut along the grain, not against it. Try to make uniform cuts – if you go too deep with the cuts, too fast, you can damage both the piece of wood you’re working on and the drawknife itself. The following is a good video illustrating how to use a drawknife to shape a piece of wood.
How to Sharpen a Drawknife
Wrapping Up
A drawknife is an outstanding tool for carving, debarking, and shaping wood. It’s a tool whose function nowadays has been replaced by power tools. As with all hand tools, you can get a completely different style and feel of the resulting piece in comparison to power tools. Remember that practice makes perfect, but once you get used to the principles of the drawknife it’s a straightforward tool to use.
Thanks for reading! Leave a comment if you have any questions or comments about this classic tool.
