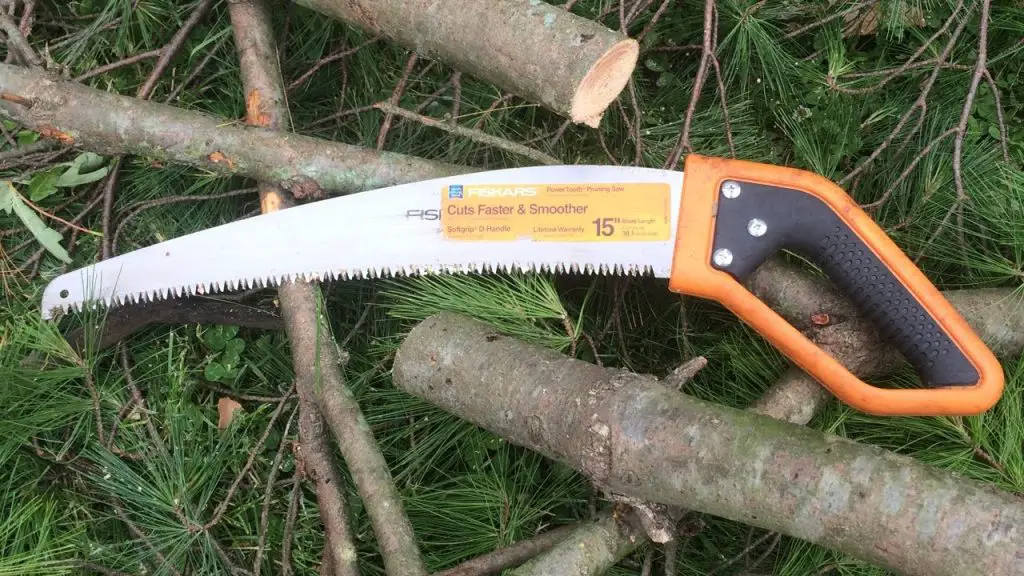
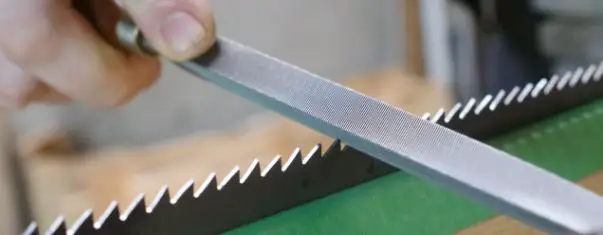
To sharpen a pruning saw, use a triangular or tapered file matching the tooth size. Secure the saw in a vice or clamps. File each tooth in the same direction as the bevel, maintaining the tooth angle. File each tooth the same number of strokes to ensure even sharpness across the blade.
To sharpen a pruning saw, start by removing the blade from the handle. Then, remove any debris and rust on the blade. Finally, using a file, sharpen the teeth and the grooves between them.
After you’ve sharpened the entire length of the blade, carefully wipe it clean. Then, lubricate it to protect it against the elements. Finally, reattach it to the handle, and you’re all set!
Interested in finding out more? Then, keep reading!
Table of Contents
What Is a Pruning Saw?
Pruning saws are versatile gardening tools designed to cut tree branches and thick bushes. It may look like any ordinary saw but comes with a medium-length curved blade.
The blade is attached to a sturdy handle with an ergonomic design, which serves two purposes. The first is to help reduce hand fatigue. The second provides a better grip on the saw, thus allowing for a cleaner cut and reducing the risk of injuries.
Types of Pruning Saws
Because they can be quite handy, manufacturers have come up with various types of pruning saws. Each can cut through different branch thicknesses and widths.
Check out the three most common pruning saws on the market:
Commercial Pruning Saw
Landscapers and professional gardeners rely on these models more than the average homeowner. This is because commercial pruning saws are the big-sized versions of a conventional pruning saw.
So, you’d typically use them to slice through heavy tree branches too big for a standard handheld pruning saw.
Handheld Pruning Saw
This pruning saw is the most common and widely available for homeowners and amateur gardeners. They’re the perfect size to suit almost everyone. Plus, they’re low-fuss and easy to use.
You can opt for a straight or curved blade, depending on the type of branches in your yard. For example, straight blades are an average of 13 inches long and are great for cutting sap or green wood.
On the other hand, curved blades are usually about 14 inches long and can cut through branches up to eight inches thick. Even the handles are curved to make the cutting process quick and effortless.

Pole Saw
As you may have guessed, pole saws, also known as pole pruners, have extendable handles that reach up to 18 feet high.
They also feature a squeeze mechanism built into the handle. When you press on this mechanism, the jaws on the end of the pruner snip off the branches.
The main difference between a pole pruner and a regular saw is that the teeth are smaller. Plus, some models come with a rotating head, making it easier to get to difficult-to-reach angles.

What Equipment is Required
One reason for regularly sharpening your pruning tools is that getting anything done with a dull blade takes much longer. Another reason is that making even the smallest cut requires an arduous, back-breaking effort.
Yet, the most important reason is that cleaner cuts on a plant will heal faster and more efficiently. As a result, they become better equipped to fight off pest infestations and diseases.
Here’s a list of everything you’ll need to sharpen your pruning saw:
- A screwdriver or spanner to remove the handle
- Clamps or vice to hold the saw in place
- A flat container long enough to hold the blade
- A feather-edge file to sharpen the saw blade
- Lubricating oil
- Sandpaper
- Steel wool
- Rags
- Water
- White vinegar
- A pair of thick, heavy-duty gardening gloves
- Safety goggles or glasses
How to Sharpen a Pruning Saw
Regularly sharpening your folding pruning saw can help protect your hands and ensure that all cutting jobs are done swiftly and efficiently.
These five steps will walk you through the process.
Step 1: Separate the Blade from the Handle
The first step in the sharpening process is to remove the blade from the handle.
However, not all blades are detachable. So, read the user’s manual to familiarize yourself with the features of your saw.
An unattached blade makes the cleaning and sharpening process much less of a hassle. Yet, if your pruning saw doesn’t have this feature, you can still follow the same steps. It’ll just take a little longer.
Step 2: Remove Rust and Debris
Fill the tub with enough vinegar to cover and soak the blade. The vinegar will help clean off the rust, so the longer you leave the blade in the tub, the easier it’ll be to clean.
I usually leave the blade in a vinegar bath for about 3–7 days. Of course, this depends on how bad the condition of the rust is.
Before handling the saw, put on all your protective gear. Even a dull blade can be extremely dangerous. So, make sure you protect your hands and eyes.
The next step is to remove the blade from the vinegar. Next, wipe it dry with a clean, dry cloth. Then, use steel wool or woollen rag to clean off any remaining rust, dust, and debris lodged between the teeth. If it needs more elbow work, you can always use a wire brush to remove any stubborn rusty spots.
Finally, wipe off any moisture residue from the blade with a clean cloth. Then, add a couple of drops of your choice of lubricating oil to the cloth and wipe the blade to help protect the blade from future rusting.
Step 3: Secure the Saw Blade on a Sturdy Work Surface
Secure the blade in place using clamps or a vice. Position the blade so that the serrated edge is facing upwards.
Keep in mind that you’ll be changing the position of the saw as you work. So, try to find a wide surface area. Also, ensure it stays as steady as possible throughout the process to avoid any injuries.
Step 4: Set the Teeth of the Blade
Pruning saws are also known as ‘crosscut’ saws. They’re designed to cut across the grain, as well as when you pull on the saw.
Sometimes the gaps between the teeth aren’t the same, giving a dull, uneven cut. So, you need to bend alternate teeth outward to widen the cut and prevent the saw from getting jammed in the wood.
This is what experts refer to as ‘setting’ a saw. You can do this with the help of a saw set, which is a pair of pliers and a vise. It helps ensure you get the correct width and height of the offset for each tooth as follows:
- With the teeth facing upward, place the saw set on the first tooth at the tip of the saw.
- Make sure the vise is sitting correctly on the edge of the saw.
- Next, press down on the grip to set the tooth.
- Repeat step number two on every alternating tooth along the length of the blade.
- Then, turn the blade around and repeat on the other side, but in the opposite direction.

Step 5: File the Beveled Side of the Blade
After setting your saw, it’s time for some sharpening.
Typically, pruning saws have two edges to prevent them from getting stuck in the wood. One side is the bevelled edge, where all the teeth bend at a slight angle near the tip of the cutting edge. The other side is the flat edge, which helps provide a clean cut and a more effortless pull-push action.
The good news is that you’ll only sharpen the bevelled edge. The bad news is that you’ll need to file the teeth one by one and the grooves between them.
Start by positioning the file at the same angle as the teeth at about a 30-degree angle. Then, move the feather edge saw file in one straight, forward motion.
Never go back and forth to avoid injuring yourself or damaging the saw.
Generally, I only have to give each tooth about eight strokes for standard touch-ups and up to 15 if it’s a mildly dull saw. However, if your saw is particularly dull or rusty, you may have to give each tooth as many as 20 strokes.
Just remember how many strokes you did and repeat the same number on all other subsequent teeth.
How to Maintain a Pruning Saw
Do you know that old saying, ‘An ounce of prevention is better than a pound of cure?’ It turns out that it applies to pruning saws as well.
My advice is to always clean your tools after each use. It could be as simple as using a cloth to wipe away dirt and debris.
After that, add a bit of lubricating oil, food-grade silicone spray, or lithium grease to protect all the parts against corrosion and rust. They work by replacing moisture and keeping the tools in optimal condition.
Finally, always store your tools in a dry area. Keep them away from moisture and direct sunlight, quickening their deterioration.
Conclusion
Tools can last a long time with proper care and maintenance. One way to do that is to learn how to sharpen your pruning saw.
Hopefully, my guide has shown you all the materials and steps you need to ensure your saw is well-protected. Now, you’ll be able to keep all your tools in good condition for years to come. If you have a large collection of axes, you can sharpen all of your tools at the same time.
